Roles and Access Control
Roles are useful for granting users to access certain functions only. Currently, here are the designated roles meant for the different key operations.
| Role | Access |
|---|---|
| DefaultAdmin | Able to perform all operations |
| MinterRole | Able to mint new tokens |
| AccepterRole | Able to accept a token returned to issuer |
| RestorerRole | Able to restore a token returned to issuer |
A trusted user can be granted multiple roles by the admin user to perform different operations. The following functions can be called on the token contract by the admin user to grant and revoke roles to and from users.
Using Code
Grant a role to a user
import { v5RoleHash } from "@trustvc/trustvc";

await connectedRegistry.grantRole(v5RoleHash.MinterRole, accountAddress);
Can only be called by default admin or role admin.
Revoke a role from a user
import { v5RoleHash } from "@trustvc/trustvc";

await connectedRegistry.revokeRole(v5RoleHash.AccepterRole, accountAddress);
Can only be called by default admin or role admin.
Setting a role admin (Advanced Usage)
The standard setup does not add the role-admin roles so that users don't deploy (and, hence, pay the gas for) more than what they need. If you need a more complex setup, you can add the admin roles to the designated roles.
import { v5RoleHash } from "@trustvc/trustvc";

await connectedRegistry.setRoleAdmin(v5RoleHash.MinterRole, v5RoleHash.MinterAdminRole);
await connectedRegistry.setRoleAdmin(v5RoleHash.RestorerRole, v5RoleHash.RestorerAdminRole);
await connectedRegistry.setRoleAdmin(v5RoleHash.AccepterRole, v5RoleHash.AccepterAdminRole);
Can only be called by default admin.
Using Browser
Follow below steps to Grant Role using grantRole Function
-
Step 1: Copy the Role Hash
-
Open the Contract Page on Sepolia (Etherscan or your preferred block explorer).
-
Navigate to the "Read Contract as Proxy" section.
-
Find the functions ACCEPTER_ROLE , MINTER_ROLE, RESTORER_ROLE and click on any one you want the role hash.
-
Copy the returned role hash. (Refer to Image 1: Copying the Role Hash)

Image 1: Copying the Role Hash
-
-
Step 2: Paste Role Hash & Address
- Connect MetaMask: Click on the "Connect Wallet" button to link your MetaMask account. Ensure you are on the Sepolia network.
- Scroll down to the "Write Contract as Proxy" section.
- Find the function grantRole and click on it.
- In the first field, paste the copied role hash.
- In the second field, enter the recipient’s address to whom you want to grant the role. (Refer to Image 2: Pasting the Role Hash & Address)
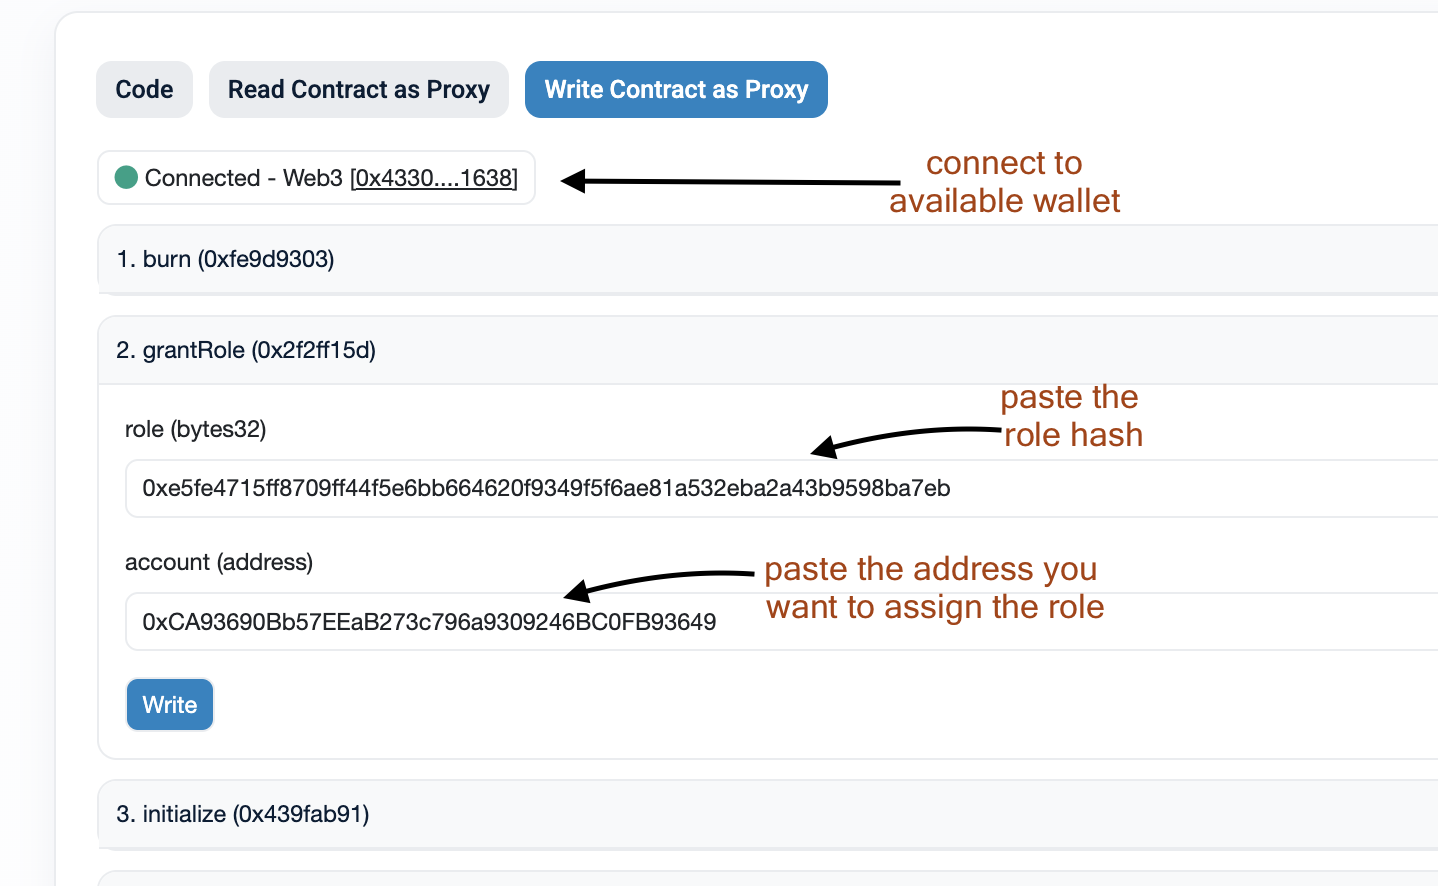
Image 2: Pasting the Role Hash & Address
-
Step 3: Confirm Transaction
- Click on the "Write" button.
- A MetaMask (or other wallet) prompt will appear. Review the transaction details and confirm.
- Wait for the transaction to be processed. Once confirmed, the role is successfully granted!
Same Steps can be followed for Revoking a role
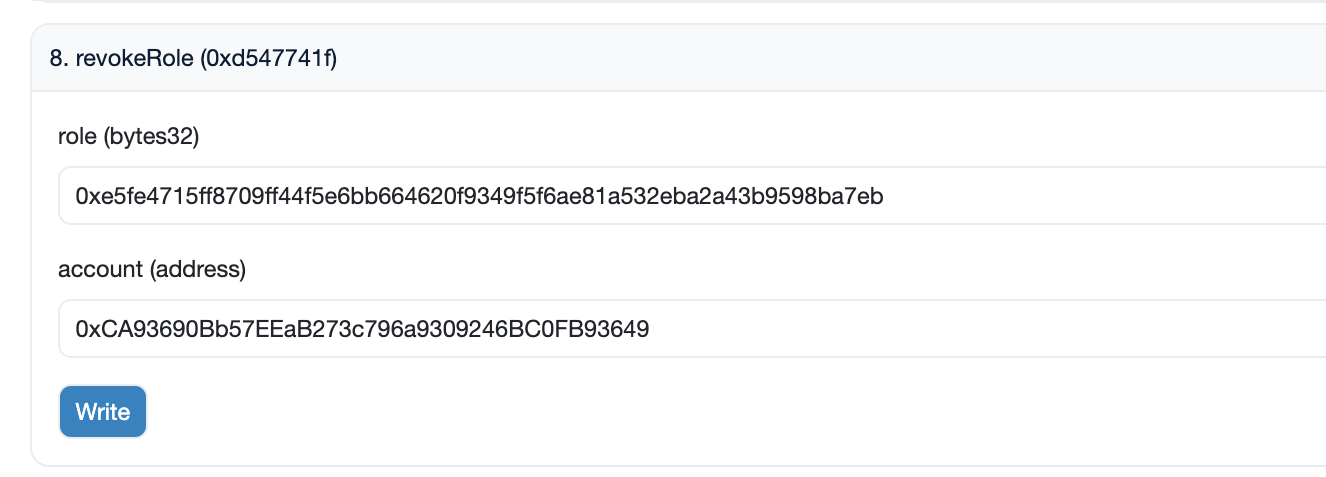
Image 3: Revoke role